 |
 |
 |
 |
 |
|
|
|||||||
|
|---|
|
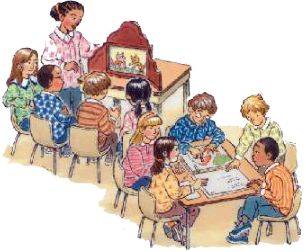
Children Created Kamishibai 1. Kamishibai stories can be made individually, in pairs (one illustrator, one writer), in small groups or as a class project. 2. The sources for student-created kamishibai are unlimited: original ideas, topics related to the curriculum, the retelling of an existing story or some item of current events. 3. Kamishibai stories do not have to be a specific
length. 4. Some children prefer to start by drawing illustrations; others by creating the text, either way works. 5. When composing the text for a kamishibai story,
remember the characters use dialogue. The children can either write
or dictate the story and dialogue. 7. Check to see that the sketches correlate with the text. Reread and edit the text. Work on the final illustrations. 8. Arrange the illustrated cards in order and write the number for each card in sequence in the front, lower left-hand corner. 9. Tape the text for illustrated card #1 to the back of the last illustrated card. Tape the text for illustrated card #2 to the back of card #1 and so forth. 10. Now your children have their own kamishibai
story. Children gain proficiency and fluency when they perform the stories
they have created. "The Travel with Koinobori"— is a delightful child-created kamishibai. It was written and illustrated by Kayo, an 11 year old student of Tara McGowan. In this paper, Tara explains how Kayo combines her knowledge of both Japanese folklore and American popular culture, as well as her understanding of kamishibai illustrating techniques, to tell a highly inventive story. It is here in PDF format and can be downloaded and printed. "Video of Kayo performing The Travels with Koinobori
|
|---|
 |
|---|
|
Kamishibai for Kids ~ 2358 University Avenue #179, San Diego, CA 92104 |